My 2nd post on photoshopping...
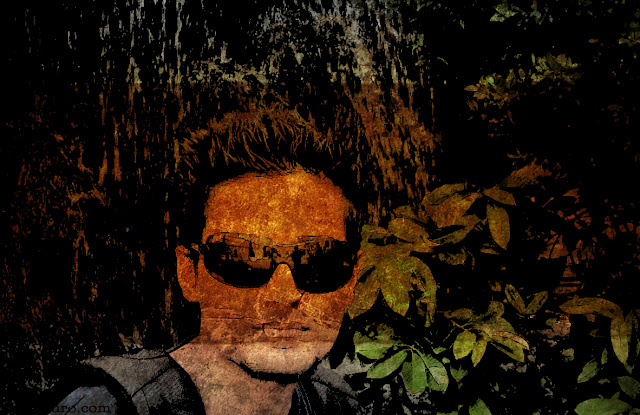
Remember what I told u in my 1st post??..about using your own photos and editing them...thtz wht I did here(used a photo of myself). I used many layers in photoshop CS4 here.
This is a line art illustration. The concept of line art uses different densities of crosshatching to simulate lighter and darker shades of grey. Now, I went through some steps to have the desired effect. These steps can be altered if you have something else in mind. But, the following steps will atleast give you the transition my photo has undergone.
The steps are:
1. Open the photo you want to work on
2. Download brush set from
and download a suitable texture that you want to use.
3. a) Duplicate the layer.
b) Apply Smart Blur: Filter > Blur > Smart Blur. In the pop-up mode set to Edge Only. This will produce an inverted line art effect. Invert: Image > Adjustments > Invert. Hide this layer, we will use it later. Create a white layer above the original background (face)
4. Create 2 different patterns.
a) Create a new document with a with background
b) Draw a 45 line on a new layer
c) Use: Alt-Shift-Command+the right cursor to create a copy of the line to 10 pixels to the right. Continue until you get a set of strips.
d) Merge the layers
e) Select a square area
f) Create the pattern: Edit > Define Pattern
g) Name the pattern stripes 1
Now create a second pattern
a) Reflect the strips horizontally
b) Repeat the process from letter e
c) Name the pattern stripes 2
5. Create the first layer of shadows line art
a) Duplicate another layer of the background
b) Apply Threshold: Image > Adjustments > Threshold
c) Move the threshold level so you get the layer areas of shadows
d) Open the Layer Style and apply Pattern Overlay
e) Select the first pattern you created
f) In the blend mode of the dialog box select Lighten
g) Scale the pattern till you like it.
h) Convert this layer to a Smart Object: in the layers dialog box select Convert to smart Object
i) Set the blending mode to multiply
Similarly create a second layer of shadows line art and set the blend mode to multiply.
5. Bring back the edges
a) Move to the top of the layer stack the Edge layer created in step 3
b) Set the blending mode to multiply
For darkest shadows:
a) Create another copy of the original layer
b) Apply threshold
c) Set the level so you only get the darkest shadows
d) Be sure that this layer is on top of the layer stack, set the blending mode to multiply
6. Background Paper
a) Open the texture file
b) Drag and drop it to the main file
c) Place the layer above the white and below the shadows line art
d) Select the eraser tool, select a small brush with a 30 % opacity
e) Erase some areas inside the face like the cheeks, it doesn’t has to be perfect we are emulating ink coloring
f) Now increase the opacity to 50% and erase the external part.
Your Line Art is ready!!
Tell me how whether you liked my 1st tutorial on photoshop or not.


